- Fund
- slide color scheme
- Sources Transition
- slides
- etc.
But for this tutorial (basic), just create a template by setting the background and will post some pictures.
1 .- Open a new document in the power point. 
2 .- menu View, select pattern and then Slide Master .

3 .- In the next screen will show the pattern of the slide, from here we configure each of the items shown in the figure below, such as color and text size. But as I said above, this exercise only configure and add background images, so select each of the elements and eliminate them (by clicking on the dotted lines and pressing the [DELETE] or by clicking with the mouse from the corner top left and drag and hold up the lower right corner to select all items in one step and then press the [DELETE]). We must stop the slide blank.

4 .- In this step, you add all elements of our workforce, in the figure below we see that added 2 boxes with gradient fills, an image of a robot, a text (using the WordArt  , including power point) and the bottom of the slide.

- How to insert the picture? Using the Insert menu , Picture, From File ... We will show a dialog box where we select our image, depending on your location in our wallets. We can also use clip art images that come in Power Point.

- How to make the bars with the gradient fill? Draw a rectangle using the drawing toolbar, the rectangle tool :

If there is no drawing tool, we can add in the menu: View , Bar tools and selecting Drawing .

For the gradient, use the tool fill color  bar drawing tools and select the option to fill effects. We will display a dialog box fill effects, the configured as shown in the figure below and we click on OK.

- How do I set the background? We will click the right mouse button anywhere on the white background of the slide and will show a menu, select the option Fund ... and then on the next dialog box select the color (you can use fill effects: gradient, place a background image, texture, etc..) Immediately after we click on the button Apply to All as shown in the figure below.

5 .- Since we have inserted all the elements of our staff, we just have to click on the button Close Master View.

6 .- Now save your work as a design template by clicking the File menu , Save As ... and Type, select design template. (The template is saved by default in the folder microsoft templates, but we can save in any folder)

7 .- Now how do we use one template in our presentations? - When opening a new document in PowerPoint, using the menu: File, New ; only give here, in the section NEW (right side of the screen), at the option of From a design template, we can select one template which is displayed or, if in such case, save the template in another location, we can click on the option examine where we will display a dialogue box where you can navigate to the location of the template. In the same way we can click on the Templates seccción of , option in my PC ... , and select the desired template. If for some reason does not display the task pane on the right, we can click the right mouse button on the white part of the slide and select in the menu that appears, the option of Slide Design ... , to show us the task pane.
Task Pane:


NOTE: You can modify existing templates OR COME BY DEFAULT IN POWER POINT, JUST NEED TO OPEN A NEW HOMEPAGE, SELECT TEMPLATE DESIGN CHANGE AND WE WILL OPEN THE SLIDE OF THIS PATTERN IN ORDER TO MAKE amendments.
TIP: IF YOU HAVE MODIFIED DEFAULT TEMPLATE DESIGN POWER POINT, WOULD BE GOOD KEEP IT WITH ANOTHER NAME FOR NOT AFFECT THE TEMPLATE THAT BRINGS THE PROGRAM.
then show you some templates I made for this exercise:


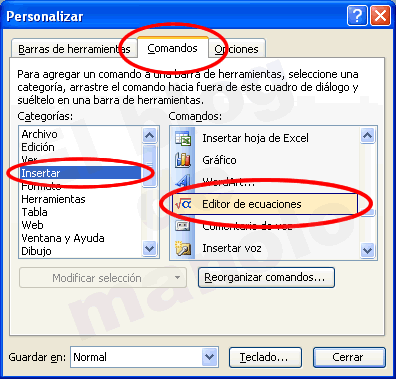 tool I could find: Equation Editor Now we must add to one of the toolbars in WORD (the one you prefer), we only need to select the Commands window the tool and drag it to any of the toolbars, as shown in Figure :


 4 .- By clicking on the button (template Fractions and radicals), shows a new set of buttons that can be used, for this exercise will deal with the two that show in the figure below (now just click to give first):


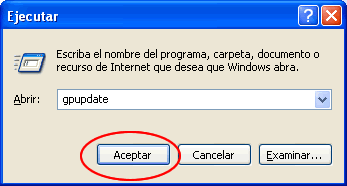
 B . On the next screen type: gpedit.msc and click to accept
  C. On the next screen shows that it is divided into two parts. On the left, in the section "Computer Configuration, double click on" Administrative Templates "(you can do a single click the plus sign +), then double click" System. " Now on the right side of the window look for "Turn off Autoplay" and double click on that option or use the right mouse click and then select the option "properties"
  D. By displaying the next window select the "enabled", also select "All drives" option from "Turn off Autoplay" and click on OK.
